Share "How to Use a Tiller"
A tiller is an invaluable tool for gardening and landscaping, but are you using your tiller properly? Safe, efficient operation is essential to make the most of your tiller and keep your garden, flowerbeds, and landscaping looking its best.
About Tillers
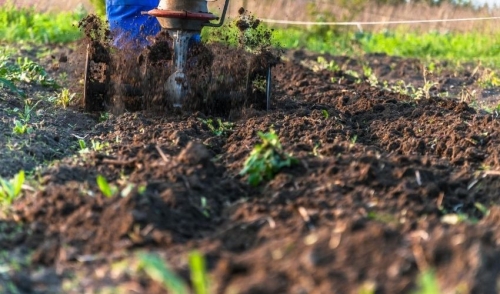
Tillers – also called cultivators, rotary tillers, or rototillers depending on size and model – prepare soil for planting by stirring and overturning soil with disks, teeth, or blades. A tiller will pulverize the soil, improving aeration, mixing in compost of manure, uprooting and shredding weeds, and loosening dirt for easier digging. This all helps make the soil easier to work and takes a lot of hard labor out of gardening chores.
Before powered tillers, hand tools such as mattocks, hoes, and forks would be used for these same tasks. In 1912 the powered tiller was first engineered in Australia, and different styles and designs have been refined as cultivation methods have changed. Today, tillers are available in different widths, horsepower ratings, and with different types of blades for a variety of applications. Smaller unpowered tillers are available, as well as tillers that may use gasoline, electricity, or battery power to assist operation. Speeds and heights can be adjusted, making today’s tillers very versatile for different gardening and landscaping needs.
Using a Tiller
No matter what type of tiller you have, it is important to read all instructions and safety guidelines before operation. Follow all the recommended operational guidelines, and take care to always use the tool safely and properly. To make the most of your tiller…
- Till at the appropriate time.
Soil will respond to tilling best when it is reasonably dry, but not so arid that it falls apart as dust. Most tilling is done in spring or fall, depending on the purpose. Squeeze a handful of soil into a ball, and if the dirt falls apart slightly, it is ready for tilling. Tilling too-wet soil can increase compaction of lower layers and may clog or damage the tiller.
- Wear the necessary safety gear.
Tillers can toss up small rocks and other debris, and the vibrations of the equipment can make it challenging to handle. Wear goggles and work boots as well as long pants and long sleeves. Thick work gloves can help prevent blisters, and earplugs can protect your hearing from the loud noises of a tiller’s engine.
- Call about buried utility lines.
No matter where you will be tilling, make the appropriate calls to check for buried utility lines, pipes, septic fields, and other underground items that could be severely damaged by a tiller. It may take a few days to have your property inspected and marked for lines, so call well before you plan to till to be sure you have updated information.
- Check the tilling area for obstacles.
Before beginning, check the entire tilling area for obstacles such as fallen branches, larger rocks, or protruding roots, as well as misplaced toys, tools, or other objects. A tiller can easily damage anything it runs across, and running over anything other than soil can damage the tiller by breaking or bending blades or clogging the engine.
- Use the right tiller for your needs.
Different tillers have different uses. A larger tiller with a broader reach is best for preparing a large garden area or completely new flowerbed, while a smaller tiller with more close-set blades is better for working around existing plants. The tiller’s design – whether the tires are in front or behind the blades – will also affect how it handles for different projects.
- Make multiple passes in parallel lines.
As you till, follow a pattern of parallel lines for the most efficient soil preparation. Use shallow to medium depth settings for the first pass, and deepen the tiller to 6-8 inches in successive passes as needed, unless the specific plants you are planning call for particular tilled depths. If multiple passes are needed, work in a perpendicular pattern to break the soil up best.
- Keep a firm grip and stay alert at all times.
Keep both hands firmly on the tiller’s handles at all times, as a tiller can have severe vibrations and erratic movements if it encounters more compact patches of soil or hidden obstacles. Listen carefully so you will note any change in engine noise or blade rattling that can indicate a problem.
- Allow the soil to rest before planting.
After tilling, leave the soil to rest undisturbed for 2-3 days before planting. This will allow any compost, amendments, and other organic material to decompose more completely before adding plants, which will make it easier for new plants to uptake essential nutrition.
Tilling is a great way to prepare your soil for smooth planting, and knowing how to best use a tiller can ensure safe, easy soil preparation in the garden, flowerbeds, and anywhere you are ready to plant.